
The high-performance, crankcase-injected model of
the SVS can be installed in approximately one hour.
All of the needed hardware is included with the unit.
A quick overview of the installation elements are:
-
Removal of the stock ECU and air horn
-
Removal of reed plate and reed cages
-
Installation of reed cages on SVS base
-
Installation of SVS base and slide
-
Installation of linkage
-
Mounting of ECU
-
Linkage adjustment

Notice to Purchaser:
The SVS system is designed for high-performance use.
The user shall determine the suitability of the product for their
intended application, and user assumes all risks and liability in
connection therein. In no event shall Brucato Inc. be responsible for damages or injury from any source.
The following instructions should be read in its
entirety before beginning installation. If you are unsure of performing
any step described, please contact your dealer.
Installation Instructions:
| Step 1 |
Disconnect battery. |
| Step 2 |
Unplug the electronic
control unit from the wiring harness on the engine. |
| Step 3 |
Disconnect throttle
rod assembly by removing it from the air horn and the throttle
arm, unscrew the white plastic piece from the throttle arm end
and set this piece aside. For 2.5 L models, remove and save
the black slotted piece on the other end, also. |
| Step 4 |
Remove the three bolts
that attach the electronic control unit to the air horn, then
remove it from the air horn, but leave the control unit mounted
to the bracket, save the bolts for later steps. |
| Step 5 |
Locate and remove the
bolts that attach the air horn to the base plate. Remove air
horn by tapping gently on it to break it loose from the gasket. |
| Step 6 |
Remove the two bolts
attaching the fuel regulator to the base plate, save bolts,
DO NOT remove it from the fuel rail at this time. |
| Step 7 |
Locate and remove all
remaining screws on the base plate. |
| Step 8 |
Remove base plate and
reed blocks from engine crankcase, set reed blocks aside for
inspection. |
| Step 9 |
Inspect reed petals
on reed blocks, if any are chipped or burned on the edges, it
is advisable to replace them now, making sure they seal correctly. |
| Step 10 |
Clean the crankcase
mounting surface of any gasket material. |
| Step 11 |
Remove the (6) #10
screws from the cover plate of the SVS. Lift cover and remove
slide assembly. Set these parts aside. |
| Step 12 |
Locate the 1/4-20 x
3/4 cap screws in kit. Install the reed blocks to the SVS base
plate with a new gasket, DO NOT torque tight reed blocks to
base. |
| Step 13 |
Locate the remaining
1/4-20 x 3/4 cap screws, (4) heavy washers are supplied to
be
installed under the mounting screws located in the center of
the base plate. It is very important that the washers are in
place or damage will occur to the base plate. Install the SVS
base plate with reed blocks to the engine crankcase. DO NOT
torque tight base plate at this time. |
| Step 14 |
Once the base plate
is installed, remove one screw at a time from each side of each
reed cage and apply loctite to the threads, reinstall and torque
to 60-inch pounds evenly. |
| Step 15 |
Tighten the remaining
SVS base plate screws, working from the middle to the outer
screws evenly, and torque to 60-inch pounds, loctite should
be used. |
| Step 16 |
Locate the throttle
slide assembly, lubricate both sides with light oil, install
slide assembly into SVS base plate and slot in bell crank arm,
making sure it is free of any dirty materials that may cause
binding of throttle assembly. |
| Step 17 |
Locate the SVS outer
cover plate, install with (6) #10/24 x 7/8 stainless cap screws
and lock washers supplied in the kit, loctite and torque to
25-inch pounds. |
| Step 18 |
Install the electronic
control unit to the 'starter' side of the SVS base plate. Loctite
and torque to 60-inch pounds, make sure bolts do not bottom
out in the base or damage may occur. |
| Step 19 |
Plug the electronic
control unit back into the engine’s wiring harness. Make
sure the ground wire for the ECU is properly installed and tight. |
| Step 20 |
Mount the fuel regulator
onto the SVS base plate with the same bolts used during disassembly.
Loctite and torque to 40-inch pounds. Note: Cut 3/4" to 1" off
the rubber fuel line on the pressure side of the fuel rail to
ensure a proper fit, tighten hose clamp. Reconnect battery power
and turn on the fuel pump, making sure you have no fuel leak. |
| Step 21 |
Reconnect the yellow
tygon hose coming from the center bearing scavenge system to
the fitting next to the bell crank assembly on the SVS base
plate. Attach fuel pressure regulator vacuum hose to the nearest
elbow on the top of SVS, then attach the ECU vacuum hose to
the other elbow on the top of SVS. |
| Step 22 |
Locate the throttle
rod and heim joint supplied in the SVS kit. If you are installing
the SVS on any engine with a fixed timing advance, refer to
step 23. If you are installing the SVS on any engine with a
mechanical advance, refer to step 24. |
| Step 23 |
Locate the white plastic
barrel that was removed during disassembly and screw it onto
the opposite end of the throttle rod where the heim joint is
located, until it has fully threaded into the barrel. With both
the SVS throttle slide and the throttle arm on the engine in
the fully closed idle position, adjust the throttle rod length
to the preferred mounting hole in the bell crank assembly. Don't
forget the jam nut, the two holes are provided for those who
prefer a fast or a slow moving throttle. Once you have adjusted
it to the desired position and length, install the throttle
rod with the screw and spacer provided. Note: It is very important
to loctite the screw that attaches the joint to the bell crank.
Tighten to 60-inch pounds of torque. |
| Step 24 |
Locate the white plastic
barrel that was removed during disassembly and screw it onto
the opposite end of the throttle rod where the heim joint is
located, until it has fully threaded into the barrel. Locate
the black slotted piece that was removed during disassembly
and replace the heim joint with the slotted piece, and don't
forget the jam nut. With both the SVS throttle slide and the
throttle arm on the engine in the fully closed idle position,
adjust the throttle rod length so that the slotted piece will
not move the throttle slide on the SVS before the advance arm
moves. The throttle arm should move the length of the slot.
On these models, SVS provides for a backlash spring. Note: The
spring is not to be thought of as a return spring, its purpose
is for backlash. |
| Step 25 |
Make sure that the
throttle stop screw on the engine is adjusted so that it will
not allow any extreme pressure on the SVS throttle slide in
the wide-open position. Adjust the idle stop screw in the same
manner, also check for any binding that may occur in the action
of the throttle. This includes both the control box and cable,
or a foot throttle and cable. If any binding does occur, identify
the cause and correct the problem. |
| Step 26 |
The SVS kit provides
(3) 1/2" spacers and (3) outer flange rings. By changing the
length of the intake tract, you will find the best performance
for your application. With the SVS, the combinations are endless. |
| Step 27 |
Use loctite when mounting
any spacer directly to the base. Using the correct screw lengths
provided will ensure trouble-free operation. |
| Step 28 |
Look over the entire
engine to make sure you have not left anything loose or out
of place. If so, correct it now. It is very important that the
installation instructions be read and understood by all who
perform the installation process. |
| Step 29 |
Start engine and adjust
the idle speed to your desired RPM by adjusting the set screw
on the front of the bell crank. |
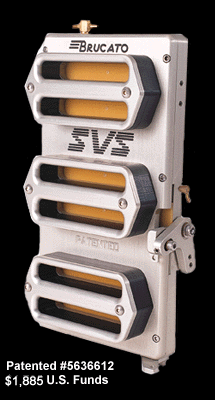
The SVS Stackable Velocity System is a registered
trademark and is patented under #5636612.
The SVS intake system is for use on 1997 or earlier
motors. For use on 1998 or newer models, application must be for
competitive use only. User must determine suitability and proper
use and assumes responsibility for use in all applications, including
compliance with EPA-regulation Emissions Inventory Improvement Program
(EIIP). Brucato, Inc. assumes no liability for improper
application or use of any SVS intake system.
Brucato, Inc.
4743 CHRISTIAN CHAPEL ROAD
NEW HILL, NORTH CAROLINA 27562
(919) 718-0249
FOR PRINTED COPIES OF THESE PAGES, PLEASE SELECT THE
LINK BELOW:
System Features | Test
Results | Articles | Instructions
& Installation Procedures | SVS Systems
| Home Page
|